Forms are a great tool to use in inbound marketing. Whether it’s to improve website conversion rates or to help you gather new contacts for your company and obtain additional information from your existing contacts - they’re easy and important to implement. Thanks to HubSpot, we’re able to build powerful forms really quickly with the drag-and-drop form builder. Here’s how you can set up your own.

Forms go beyond simple data collection to empower the rest of your marketing tools. You can use forms to add to as many landing pages as you want and assist with marketing automation as well as lead management.
We’ll run through how to set them up, how to analyse and organise them, and progressive profiling as well as the role they play for Inbound success. Just click on the link below to jump to the relevant section.
- How to Set Up Forms in HubSpot
- How to Analyse and Organise Your Forms
- Progressive Profiling
How to Set Up Forms in HubSpot
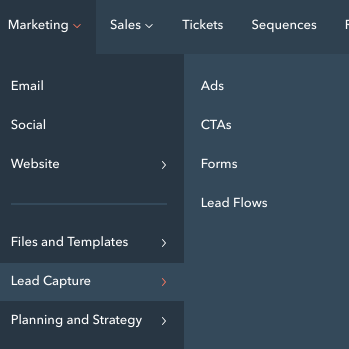
1. Go to the Forms Tool
In your HubSpot Dashboard, navigate to Marketing, find Lead Capture and click on Forms.
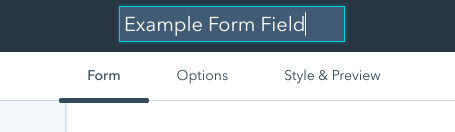
2. Create and Name Your New Form
From the forms dashboard, click Create Form at the upper-right. Then, at the top of the form editor, you’ll be able to name your form by hovering over the form name and clicking on the pencil icon to edit.
3. Add Fields to Your Form
Depending on whether the page your form will appear on is an awareness, consideration or decision page, decide which fields you’ll add. In the Add form field section on the left-hand side, you can search for fields and add them to your form.
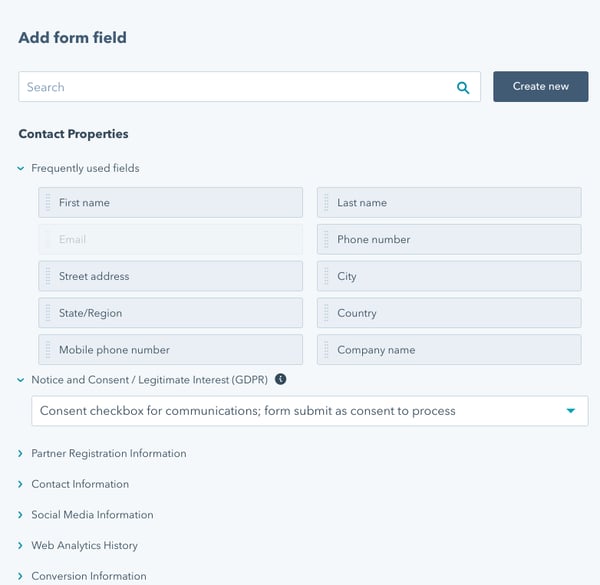
From the available fields, you can simply click, drag and drop the fields you want to use on your forms. They can be placed above, below and next to other fields.
4. Mark Required Fields
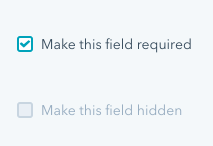
If you’ve included fields that should be required upon submission, click on the pencil icon to edit the form and tick the box labelled ‘Make this field required.’ Or if you want to remove a field from your form, hover over it and click the Delete button.
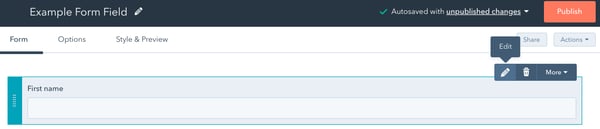
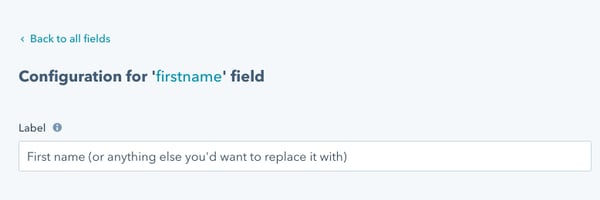
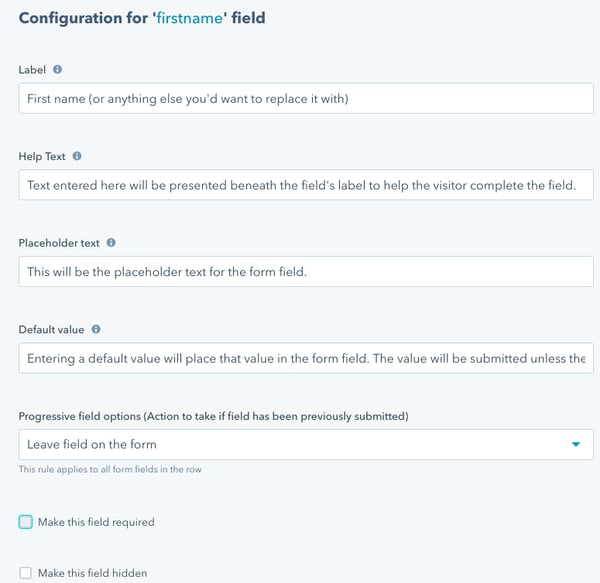
If you want to edit the display options of your form field, hover over the field and click Edit. Once the configuration field loads up, just edit the name of that field under the Label option and this is what will appear on the form for this field.
An optional step here is to edit other property options. For example, you can make the field hidden to pass certain values into contact properties, add placeholder text and more.
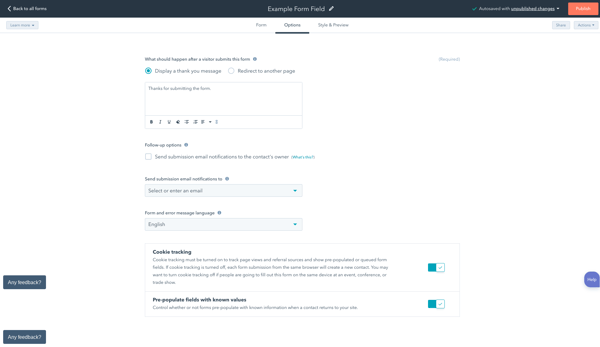
5. Configure Your Form Options
Once you’ve finished editing your form fields, click the Options tab at the top of the editor. Then, you’re given several options.
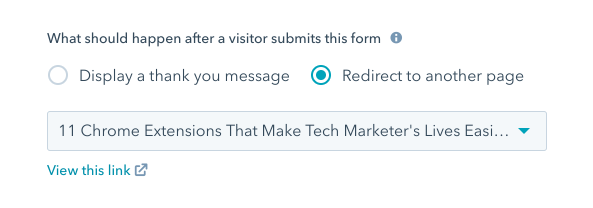
- What should happen after a visitor submits this form: If you want your visitors to stay on the page once the form is submitted, select Display a thank you message and type your message in the text box that appears.
If you want to redirect your visitors to another page, then select a different page from the drop-down menu.
- Follow up options: If you want the contact’s contact owner to receive an email notification that their contact has submitted the form, select Notify contact’s HubSpot’s owner of their submission.
- Send submission email notifications to: Pick user email addresses that should receive form submission email notifications from the drop-down menu.
- Error message language: Select the language to display your error messages if visitors make a mistake when filling out the form.
- Cookie tracking: Toggle this option on or off depending on your cookie preferences.
- Pre-populate field with known values: Choose whether or not fields with known values should be pre-populated. This helps to remind visitors that they’ve already visited your website and filled out the information.
6. Allow Submissions Without Emails to Create Contacts
To allow submissions without emails to create contacts, hit the gear icon in the main navigation bar. Hover over Marketing and click on Forms. Then click to toggle the Allow submissions without email addresses to create contacts switch on.

7. Save, Test and Publish Your Form
Once you’re happy with your form, that’s it. We’re all done. Hit the Save form button to make sure you don’t lose your changes. Before publishing, though, test your form to see what your live form will look like.
To do that, hit the Test tab and if you have progressive profiling enabled (which we’ll get on to), then you can click Preview form behaviour to see how the form will change for visitors who have already filled certain fields in.
To publish after you’ve made your final modifications, hit the Publish button in the upper right corner to make it live. Once it’s published, it’s ready to use on your HubSpot page or external websites.
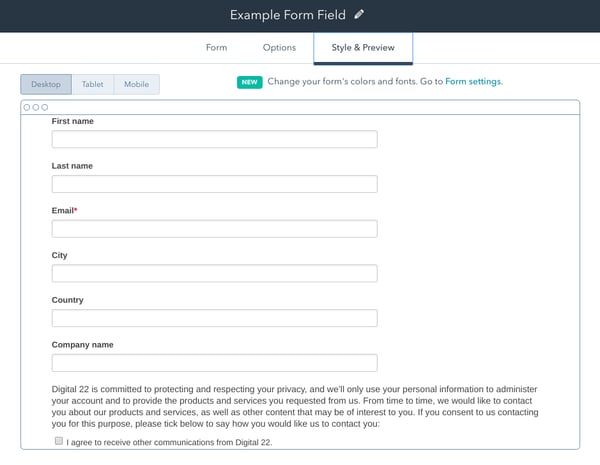
8. Link Your Form to Your Pages
In this example, we’ll stick with a landing page. Make sure your landing page contains a form module in order to add a form. In the form module options, select Redirect to another page to redirect visitors to the page you want them to see.
How to Organise and Analyse Your Forms
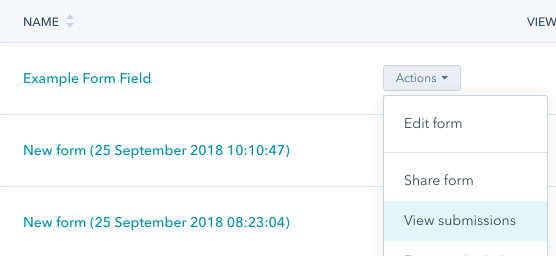
Once your forms are up and running, you’re able to organise and analyse them in your Forms Dashboard. Just like we created the forms, copy step one from the previous section and navigate to Marketing, find Lead Capture and click on Forms.
Your entire database of forms will then appear on your screen. In our example, hover over the Actions button and click on View submissions.
Considering the form was made at the time this blog was written, we’re not really going to have any meaningful analytics to show. Instead, we’ll show you what happens when you click on View submissions for another form and what to analyse.
A good way to organise your forms is by deciding how far back you want to see the analytics or the type of forms they are. You can see submission and conversion rates from the second the forms went live right through to today, this week and this month.
Also, organisation is much easier when you give your forms recognisable names. This way, you won’t forget what the forms were created for and will instantly know what their main focus is.
On the menu bar, you can even click to organise your forms by views, submission rates and the actual number of submissions.

Once you load up the form you want to analyse, you’re able to see how many views it’s had from the time period you’ve selected, how many submissions the form has had and the conversion rate.

This gives you an overview of how many submissions you’ve had but also shows that changes can be made to the forms to help boost that conversion rate. Depending on the type of page the form is on - awareness, consideration or decision - fields can be added or removed to test if there will be an increase or decrease in the figures above.
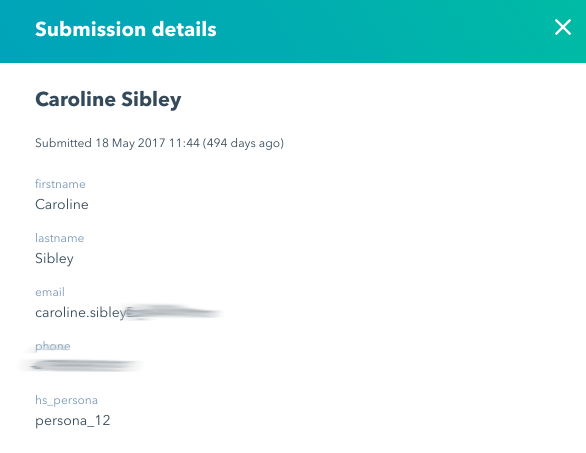
Considering the end goal is to nurture those leads and to make them convert, these changes are necessary. If you also click on a contact, you can also see which fields they submitted and what they chose to leave out.
By checking what has been filled out, you’re able to determine which fields can be added or removed to help conversion rates. Some examples to include at different stages are:
- Awareness: Keep it sector-specific with some high-level industry stuff. Don’t make it anything too personal and just focus on what your visitors’ top pain points are.
- Consideration: Your consideration stage forms can include something as simple as asking visitors if they’re currently using a similar product or service to what you offer.
- Decision: This is where you can get some more in-depth information. Think along the lines of your visitors’ contact numbers and their company name.
Progressive Profiling
Progressive profiling is an advanced feature on HubSpot but it’s still highly beneficial to use if you have the Professional or Enterprise tier.
This feature allows you to change what information your forms gather from your visitors as they interact with your website over time. Firstly, you’re able to increase initial conversions by asking a couple of vital questions the first time visitors convert. This is important as shorter and less invasive forms can help make more prospects become leads.
Along with this, you’re able to ask new questions on each visit. So, you can mark fields on your form that will be replaced with new questions the next time a lead visits. By asking different questions, you’re getting a lot more information out of them to help personalise your marketing and gather better lead intelligence.
Finally, you can ask the right questions at the right time which is key for Inbound success. Think about it, once your leads have visited a couple of times, you can target different types of questions to them that are more relevant to them depending on where they are in the sales process.
It’s quite simple to see how it works, too.
Visit One: Visitor becomes a lead as it’s the first time someone visits your website. You display a short form asking for basic information so they’re added to your contact database.
Visit Two: Lead becomes a Marketing Qualified Lead (MQL). When the lead comes back the second time, you already have their basic information. Now, you can ask more targeted questions which are remembered by HubSpot so they only need to answer once. This way, you’re progressively gathering more lead intelligence over time.
Visit Three: MQL becomes a Sales Qualified Lead (SQL). As people continue interacting with your marketing content, you’re able to personalise your forms to gather even more targeted intelligence. When leads answer specific questions that are important to you, you’re able to notify any team members in real time. For example, a salesperson when a lead becomes an SQL.
This all fits perfectly in line with your Inbound Marketing plan and is essential to success in Inbound.
You’re unable to convert leads without a form. You can do this by tailoring your forms to each visitor’s lifecycle stage and to each of your buyer personas. At the close stage of the Inbound Methodology, you can tailor each form to its specific purpose to make sure every single lead knows exactly what they’re getting.
In the delight stage, forms can help you provide the greatest customer service possible by allowing you to specifically address the concerns, challenges and goals your customers face.
Learn More About the World of Inbound Marketing
By now, it’s clear to see just how important HubSpot Forms are to successful Inbound Marketing campaigns. The work doesn’t end there, though. Forms are joined by factors such as A/B testing, blog emails, tracking URLs and so much more which all contribute to successful campaigns.
We’ve made it much easier for you to digest all of this Inbound Marketing knowledge by creating an easy-to-read guide.
While that’s receiving the final touches to make it ready for you to download, why not join our private Facebook Group for all things Inbound Marketing? Click on the link below to join.
%20(2)-1.jpg?width=375&height=225&name=_DSC1871%20(1)%20(2)-1.jpg)
