So you’ve planned out a brilliant marketing campaign with the rest of your team and you know you have methods in place that will help you surpass your targets. That’s great. Although, another thing you should be using are tracking URLs. These help you measure the effectiveness of your marketing campaigns - here’s how you can set up your own tracking URLs in HubSpot.

You should be using tracking URLs when you’re directing traffic to a page with the HubSpot tracking code from somewhere other than the CTAs you’ve created. These can include things like emails or even a pay-per-click (PPC) campaign.
Think of it as a normal URL but with added parameters. So when visitors are heading to your website from a tracking URL, HubSpot is able to separate that traffic in the sources report so you can see exactly how it performed. With that out of the way, here’s how you can set your own up.
Setting Up Tracking URLs - A Step by Step Guide
Navigate to the Tracking URL Builder Tool
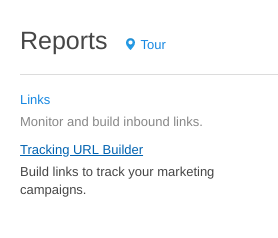
- Regardless of the type of HubSpot tier you're on, hover over Reports and click on Reports, the final button on the dropdown menu.

- Next, you'll find 'Tracking URL Builder' on the left-hand side. Click on that so you can move on. Once the page has loaded, click the orange button on the right-hand side so you can create a new tracking URL.
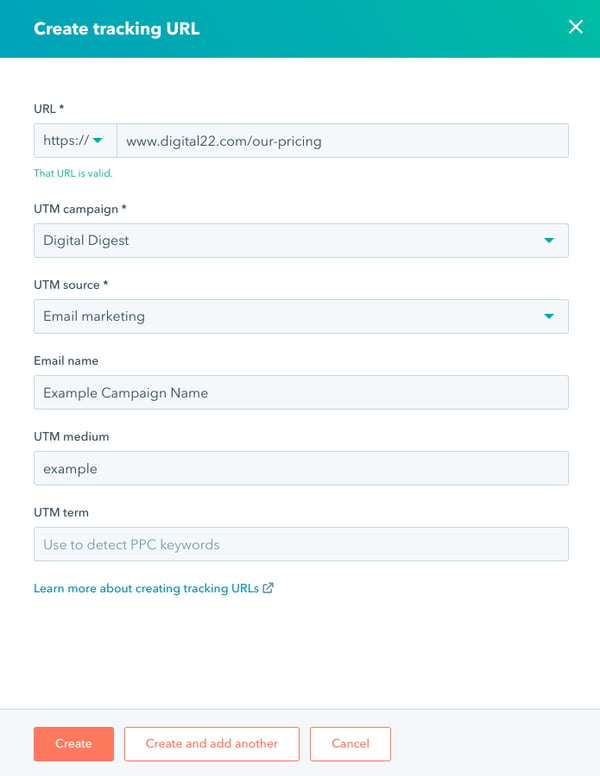
 3. Once you've clicked on the button, the below page will pop up. Then, you will need to fill out each section. We'll use a HubSpot demo as an example.
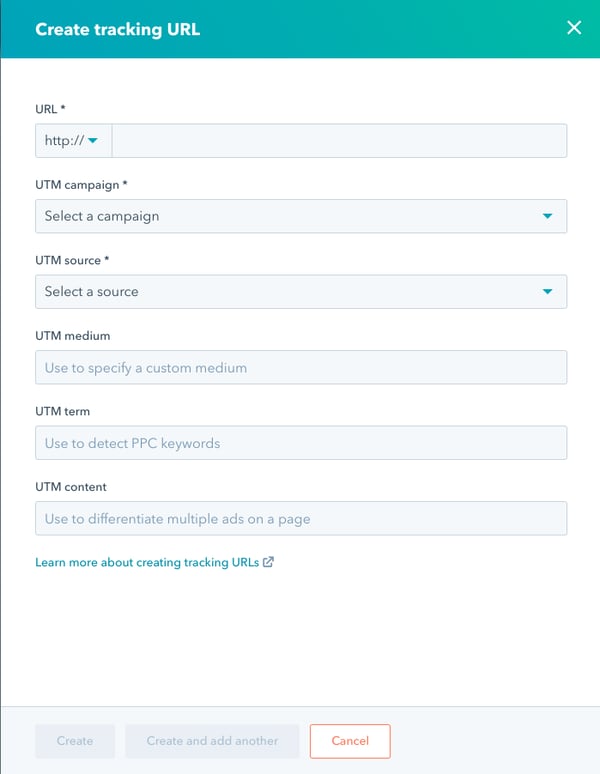
- URL: Add the URL of the page you want to link to. It can be any page that has a HubSpot tracking code on it. If your page isn’t hosted over http, you can click on the dropdown menu to select https instead.
- UTM Campaign: Click on the dropdown menu and select the HubSpot campaign that you want visits to this tracking URL to be bucketed under in your sources report.
- UTM Source: Click the dropdown menu and select the source for your tracking URL.
- UTM Medium: This is optional. If you want, fill in the name of your social post, email etc. For sources that are bucketed under the Other Campaigns option, the medium is visible when you look into a specific campaign. It’s usually the final visible parameter in tracking URLs that are built in HubSpot.
- UTM Term: Again, this is optional. It’s not something that’s used by HubSpot but it’s great to have this available as it can be used in systems like Google Analytics and AdWords to track keywords in a PPC ad.
- UTM Content: Another optional field. Here, enter the name for an ad if you’ve got multiple ads on your page and you want to differentiate between them easily.
Once you’ve filled out the fields, you should have something that looks like the following - but remember to hit save so your tracking URL has been created successfully.
Putting Your Tracking URLs into Action
It’s even easier to actually begin using your tracking URL. Check out the simple steps below.
- Head over to your HubSpot account and navigate to Reports before clicking on Analytics Tools.
- Click Tracking URL Builder.
- Hover over the tracking URL, click the Actions dropdown menu and either copy the shortened or fill link.
(Side note - if you're going to be using HubSpot tracking URLs in Google AdWords ads, you'll need to use the full link, not the short one.) - Add the tracking URL to your piece of content. to analyse the tracking URL's performance, you'll need to head to the Advanced Traffic Reporting tab to see data.
Why it’s Important and How it Helps
As we said earlier, tracking URLs are a great way of finding out just how effective your marketing campaigns really are as you’re able to assign a specific link to any source.
The big advantage with HubSpot is that you’re able to do it automatically, although the option is still there to tag emails with campaign codes or even have multiple offers in one email which are all tied back into separate campaigns.
You’re also able to give the link to an external person, such as a third-party website for a guest blog. Then, that link can be tracked in your own CRM when it’s clicked and it’s automatically tied back to that particular campaign.
Tracking URLs are mainly PPC-centric and are used for things like social ads for content pieces. For example, you may have a custom link for each social media platform and it would then pull in nicely to your CRM so you can see how effective each platform is based on the traffic and conversion from each link.
By doing this, you’re also able to separate your paid traffic from your normal or organic traffic. So, tracking URLs are incredibly useful for breaking down a huge channel - like social or PPC - into plenty of different, smaller campaign streams if you’re running a handful at once.
Learn More About All Things Inbound Marketing
Clearly, there’s a lot more that goes into an effective Inbound Marketing strategy than tracking URLs in HubSpot. Although now you know how to set them up, it’s the perfect time to pick up some more knowledge on how you can get the most out of HubSpot to boost your Inbound Marketing results.
With so much to learn, we’ve made it much easier for you to digest all of this Inbound Marketing knowledge by creating an easy-to-read guide.
Until that's ready, why not join our private Facebook Group?
We've created Inbound After Hours for marketers like you to join and share your opinions on all things Inbound Marketing. Request to join the Group by clicking below.
%20(2)-1.jpg?width=375&height=225&name=_DSC1871%20(1)%20(2)-1.jpg)
